Dungeon Painter Studio

Dungeon Painter Studio

112 ratings
Converting Roll20 Assets for Dungeon Painter Studio
By Dark_Soul
This guide outlines the process I use to most efficiently convert large numbers of Roll20 marketplace assets for use with Dungeon Painter Studio. In it, I show what programs I use and how I configure them in order to convert several hundred assets at a time, with little to no loss of quality.
2
6
   
Award
Favorite
Favorited
Unfavorite
Overview and Programs needed.
Hello, and thank you for taking the time to read this guide!

Like many (I would guess 'most') users of Dungeon Painter Studio I use this program to create maps for use with a Virtual Tabletop, or VTT, such as D20Pro, Fantasy Grounds, Maptool, or Roll20.net. My personal choice is Roll20, and as such is what this guide is about.

The Roll20 Marketplace has a mind-boggling number of assets available, but anything purchased from their marketplace isn't set up for use in DPS; at least not without a lot of adjustment. After a few frustrating, and time-consuming, attempts to convert some of my purchased content and use it in DPS I started looking around for anything to help me speed up the process. Eventually, I found two programs and a small batch file that have allowed me to convert a several-hundred-picture asset pack in about an hour, and often in less time than that.

The programs are:
Both of these programs are freeware; neither is a use- or time-limited version, and both are free for personal use.

The third thing I found was a small batch file that creates all my picture folders for me at once. To create this file, right click your desktop and create a New > Text Document. In the Notepad window, copy and paste this:

@echo off for %%a in (*.*) do ( md "%%~na" 2>nul move "%%a" "%%~na" ) pause

Save it as a .bat file with whatever filename you like and keep it on your desktop; you'll be copying it a lot.

Finally, most map making assets on Roll20 are downloadable after you've purchased them. Make sure you have a pack downloaded and available to use for the rest of the guide. Personally, I recommend Gabriel Pickard's "Vile Tiles" series. They're reasonably priced, excellent quality, and make great-looking maps. (Also, he has no idea I'm mentioning him in this guide.)

Downloading an asset pack should give you a .zip file. Extract all to a new folder somewhere convenient like the Desktop, and save the .zip file in case you need to extract everything again for some reason. Always work with copies of your downloads to you don't have to redownload an entire pack if you mess up and deleted the original .zip for some reason.
Setting up XnViewMP
Once you've downloaded and installed XnViewMP from the link in the first section, open it and go to Tools > Batch Convert (or hit Ctrl + U).


In the new window that pops up, go to the Actions tab at the top and click Add Action > Image > Resize, and configure the fields like this:


The 142.86% number is important. Roll20 requires their marketplace content to be set to 140 pixels per square resolution. 142.86% is the exact scaling amount required to scale from the Roll20 standard to DPS's 200 pixels/square requirement. Anything you download from Roll20 should always be a multiple of 140 pixels per side, and after conversion should be the same multiple of 200 pixels per side.

Regarding Lanczos resampling; everything I've read, and my own experience with using it so far, says that Lanczos is the best general-purpose method for both upscaling and downscaling pictures. Detailed discussions of the different methods are beyond the scope of this guide, but a quick google search will take you as far down that particular rabbit hole as you'd like to go.

TL; DR: Lanczos works great for what we're doing, don't change it without a good reason.

With the Actions Tab set up, go to the Output tab and set it up like so:


There are two things to keep in mind for your Output settings for this step:

First, leave the Format set to "as original". This leaves .png and .jpg files as their correct types, which is important because .png files usually have some transparency to them, and converting them to .jpgs will ruin that, resulting in solid color (probably white) areas where there shouldn't be anything at all. Anything that's already a .jpg file is probably a large file, and is saved as a .jpg to keep the file size down. Converting .jpgs to .png format probably wouldn't hurt anything, but might make the file too large to upload to roll20. As an example, I have a 25 x 25 square map on my desktop in both formats. As a .jpg it's 1.4 MB, and as a .png it's 8 MB. I wouldn't be able to upload the map as a .png on a free Roll20 account.

Second, the "Delete Original" box is checked. XnView will prompt you every time you use this setting reminding you that it's checked and asking if you want to continue. Because you're converting copies of the assets you downloaded rather than the actual zipped files, this is fine. You'll be using this folder as the one you add to DPS, so having duplicates of everything in the folder would make every asset show up twice.

Once you have all the settings entered, click the "Save Script As" button in the bottom left of the Batch Convert window, and save it as "Roll20 to DPS resize" or something similar. It will save it as an .xbs file and you'll be able to load these presets whenever you need them through the drop-down box beside the save button.

After your resize script is saved, go back to the Actions tab and change the settings to match these, for Actions:


And these, for the Output tab:


Save these settings as "Create DPS Preview".

You might have noticed that "Delete Original" isn't checked in the Preview preset. This preset takes every image in the folder and creates a 100 x 100 pixel version of it, named _preview. Setting it to delete the original would result in all your high-quality assets being deleted and you'd have to start over with a new unzipped folder.

I've noticed recently that the "Source Folder" and "Folder" buttons reset themselves to "Folder" every time, even if you've saved your script with Source Folder checked. Using the source folder will put the converted assets in the same folder as the originals you used, whereas Folder allows you to select where the converted assets go. Because I'm working with copies of the originals, I find it easiest to set everything to Source Folder when I convert anything.

Feel free to use the resize script on your extracted assets at this point; if you do, see the "Batch Converting" section of this guide. DON'T use the "Create Preview" script yet. Trust me.
Batch Converting
As I mentioned in section 1, you should download your assets as a .zip file, extract them to a folder somewhere convenient, and save the .zip in case you mess up.

Browse to your extract folder in the main XnView window, so that all your .png and .jpg files are shown, click to highlight one, several (SHIFT or CTRL + click) or all (CTRL + A) of the assets, then go into Batch Convert ( Button, Tools menu, or CTRL + U). Your Input tab should say how many files you've selected to be converted:


Make sure your Resize script is selected at the bottom, and hit Convert. A window will pop up showing your progress. On my system, converting this 482 asset pack takes just a few minutes. When it's finished, you probably won't notice any change in your asset folder until you mouse over the files again, or open one, and see that the dimensions of the picture have changed. They should be exactly 200 pixels per square.
Advanced Renamer Settings
Advanced Renamer has been a huge time saver for me. Sometimes it feels like I spend a lot of time trying to get the Methods adjusted just right, I compare that time to how long it would take to manually edit all the file and folder names. Believe me, it's MUCH faster when you're working with lots of assets.

When you install and open Advanced Renamer, you'll see a large central window with Rename Files and Rename Folders tabs, a Renaming Methods List window on the left, and a directory tree on the right. Browse to your extracted folder on the right, highlight the folder, and click "Add Selected" at the top. A window will pop up asking if you want to add files or folders. At this point you likely have a folder full of pictures with no subfolder structure. Checking "Add the files in the folders" and "include subfolders" below it should add all your pictures to the center window.

At this point, go to the Methods List on the left and click on the buttons at the bottom under "Add Batch Method". The ones I use the most are Add, New Case, Renumber, and Remove Pattern. When you add a new method it will appear in the window, highlighted in blue and expanded with its configuration options visible. Collapsing it with the +/- button on the left side will hide the options and change it to either a purple bar if it's enabled (the checkbox on the right is checked) or a red bar if it's not, and therefore ignored in a batch process.

Take some time to play around with the settings and watch what they do to your filenames in the center window. Any filename not affected by your method settings will be grayed out.

One particular setting, Renumber, takes some getting used to. My most commonly used settings for renumbering are these:


Many of the assets I've downloaded have filenames like Tree 1, Tree 10, Tree 2, etc. With these renumbering settings my three tree files will be renumbered to Tree 01, Tree 02 and so on with Tree 10 appearing after Tree 09. Having everything in numerical order is strictly a personal choice, as are most of the changes you can make to your file names.

Another one worth mentioning is the Remove Pattern method. Most of my assets are named with a number and series of letters at the beginning of the file name, such as 112233-VTSM Tree 1.png. Using Remove Pattern I can tell it to look for anything with a -VTSM at the end and remove it, using the * wildcard. Setting it to remove *-VTSM will remove 112233-VTSM from Tree 1, and will also remove 112234-VTSM from Tree 2.png.

Again, change the Method options and watch what happens to your file names. When you have a system you like, hit Start Batch at the top. When it runs it will probably go very fast. My system only takes a fraction of a second.
The Folders .bat file
In section 1 I talked about creating a .bat file containing this script:

@echo off for %%a in (*.*) do ( md "%%~na" 2>nul move "%%a" "%%~na" ) pause

When you create that file, leave it on your desktop so you can copy/paste it later. When you click on, or run it, it looks at every file in the folder you paste it into, creates a folder with the same name as that file, and moves the file into that folder. Running it in a folder with Tree 1, Tree 2, and Tree 10 png files will end up having a Tree 1, Tree 2, and Tree 10 folder, each containing their respective artwork. It will also create a folder for itself, and move into that folder. When the batch file runs, you can delete its folder.

Make another folder with 10 or so assets in it, paste this file into the folder, and run it so you get an idea of what will happen before you do it with a 400 asset pack.
The Process
Now that you have your programs installed and configured and your .bat file created, you're ready to process a full asset pack.

1: Convert to DPS Resolution:

  1. Open XnViewMP and select all the assets in your extracted folder.
  2. Open Batch Convert > Actions Tab, and load the Convert.xbs script you created.
  3. Check "Source Folder" on the output tab if it's not already, and hit Convert.

All your assets should now be resized from multiples of 140 pixels on a side to multiples of 200.

2: Create basic DPS folder structure:

At the most basic level, Dungeon Painter Studio needs objects to work with. Open your extracted folder and create a new folder (CTRL + SHIFT + N) inside named "objects". At the time of this writing, DPS IS case sensitive, so don't capitalize the O.

Move all your assets into the objects folder.

3: Rename all your files using Advanced Renamer

This can be done at any point in the process, but doing it now saves time later.

4: Batch process all the assets into folders:

Paste your folders.bat file from your desktop into your objects folder and run it. In a very large collection, go to View > Group by > Type to make it easier to find. After the .bat file runs, find its folder and delete it.

5: Move assets into grouped folders

This is the most time-consuming part of the process, but it pays off when you move the collection into DPS. Move all your similar assets into single folders. Make a Trees folder and move all the trees there, a Boulders folder, a Tunnels folder, etc. When you're done you will have set up how everything appears in DPS when you select the collection you're processing.

6: Generate preview images

When you open a collection in DPS, it first checks for _preview files for each asset in the collection. If it doesn't find them, it generates one from the full-resolution version. In large collections this can cause DPS to lag when scrolling through the assets. Using the Preview script we created in XnViewMP, generating these _preview files only takes a few seconds:

  1. Open XnViewMP and browse to your extracted folder.
  2. Select the objects folder and Batch Convert.
  3. Verify on the input tab that all your assets will be processed.
  4. Set the script to your Preview.xbs file and check the Actions tab to be sure the 100x100 pixel settings are active.
  5. On the Output tab, check "Source Folder" if it's not already and make sure "Delete Original" is NOT checked, then hit Convert

This will create a new, 100 x 100 pixel version of each asset in the same folder as the original is in, while leaving the original there. DPS will see the _preview image and load that picture instead, saving processing time and hopefully reducing lag when scrolling.

7: Move your new Collection into your DPS folder

At this point you should have a single folder, named whatever you want your collection to be called in DPS (Such as Cave Mapper, Dungeon Mapper, etc.), with an objects folder inside. Inside the objects folder should be all your assets, grouped by type (trees, rocks, tunnels) and each of them in its own folder with a _preview image in that folder as well. All of the assets should be multiples of 200 pixels per side, and all the _preview images should be no more than 100 pixels on a side.

Now, open your Steam\steamapps\common\Dungeon Painter Studio\data\collections folder. Inside you should see dragonville, fairy valley, and other collection folders. Move or paste your collection folder in here, and you're done! Open DPS and select your collection. Click on the objects button at the top, and all the folders you grouped your assets into (Trees, Rocks, Tunnels) should appear. Browse through each of those and your assets should appear, ready to use.
Closing Comments
Thank you for taking the time to read through this guide, and I hope any Roll20 players find it useful for adding their marketplace content to DPS.

Also, keep in mind that the general process outlined in this guide can be used to convert ANY assets into DPS-usable images. As long as you know what resolution (in pixels per square) the original assets were created at, you can create a new resize.xbs script in XnView using 200/(original resolution), converted to a percent.

For example, 200/140 (roll20 resolution) = 1.42857, converted to 142.857%, then rounded to 142.86% for the resize script. A 300 pixel resolution would be 200/300 = .66667, 66.667% converted, and rounded to 66.67% Always use two decimal places to ensure the most accurate resizing.

I do want to make one thing clear: Using this guide, someone could easily make a Roll20 collection usable in Dungeon Painter and upload it to the workshop. PLEASE don't do this, unless you're the actual creator of the content or have their express permission. These content creators spend a lot of time making these asset packs available to Roll20 players and deserve to be compensated for that time.

I hope anyone using this guide keeps their converted assets for personal use only, unless and until they are given permission by the creator to upload them to the workshop.

As Dungeon Painter Studio continues developing, I'll update this guide if necessary to correct any inaccuracies that arise.

Let me know what you think in the comments.
43 Comments
kytrin Jun 18, 2021 @ 5:09am 
I GOT THE FIX FOR THE GREEN AND BLACK BACKGROUND PROBLEM!

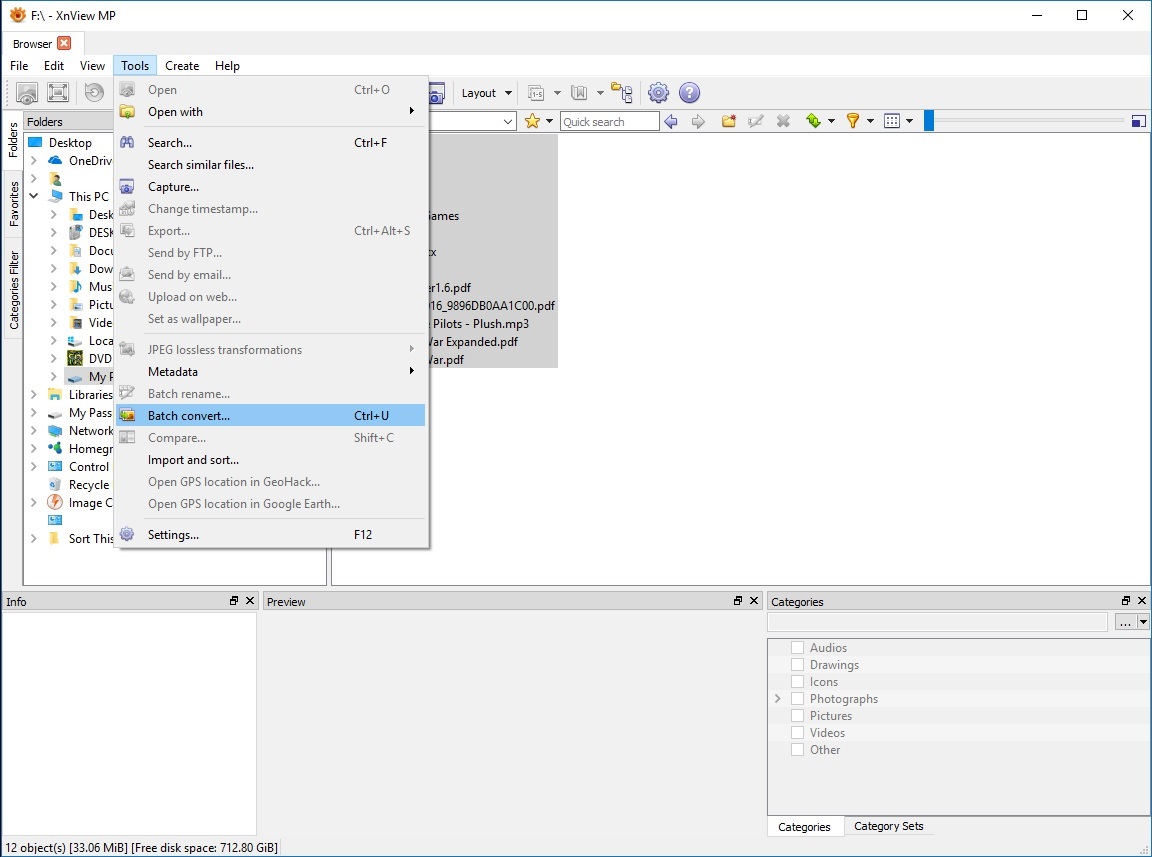
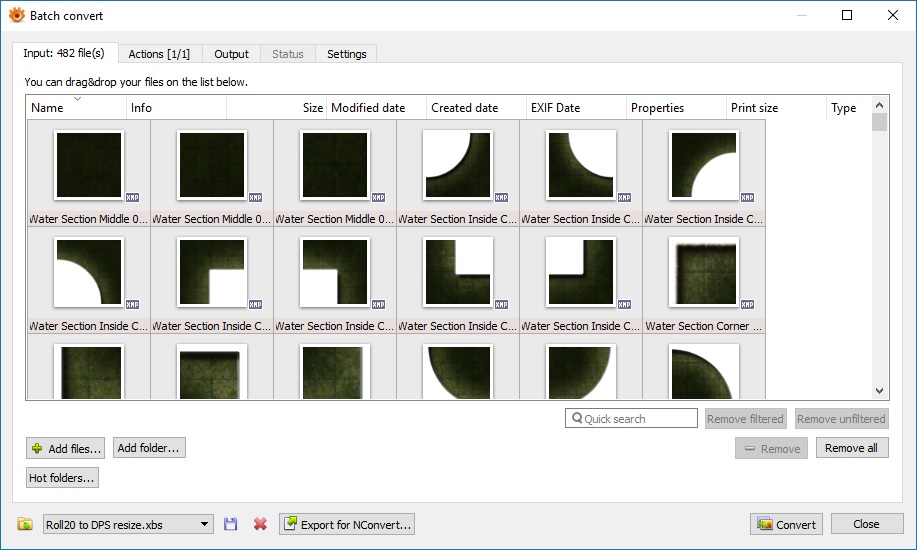
I went out to the Xnview forums and asked. The answer is to add an extra action prior to the resize. You go to image>change color depth>and set it to 32bit in order to properly preserve transparency. Just tried it on my problem batch and it worked perfectly!
kytrin Jun 15, 2021 @ 3:10pm 
Also for some reason... some of my assets are acquiring green or black backgrounds when there should be none. I've tried redoing the download, extraction, and conversion from scratch, but it keeps happening.
kytrin Jun 15, 2021 @ 9:59am 
I'm having some trouble with the preview part of this. I've created the settings and saved them as instructed, but when I attempt to run it only does the first asset. When I tried adding a wildcard, in case it was getting hung up on the name, it ran, but none of my previews generated. Where am I going wrong?
Banang May 20, 2021 @ 10:30pm 
The bat file I created with your script doesn't seem to move the files into their corresponding folders, only the bat file moves itself. Any solution?
Ruhar Feb 11, 2021 @ 10:43pm 
Never mind. I missed the step of having everything in a folder called Objects.
Ruhar Feb 11, 2021 @ 7:19pm 
HELP! As far as I know I followed every step precisely, but I cannot see my files in DPS when I open the folder in the bottom left. Did I miss something?
Dark_Soul  [author] Nov 7, 2020 @ 10:49am 
I'll go back through this and make sure everything is current.
Fumetsu Kage Nov 4, 2020 @ 10:54pm 
i followed everything to the letter but perhaps it's out of date, i noticed some discrepancies in the screen shots and the wording in some things, perhaps that is what is causing it to fail
Dark_Soul  [author] Sep 5, 2020 @ 12:28pm 
When you're working inside DPS, the resolution of the assets is lower to make them faster to work with. When you export the finished map you can do it at any resolution from 50 px/square up to 200 px. If you export them at 140 px, they'll be the same resolution as Roll20 assets, and look good when you zoom in on the map in roll20.

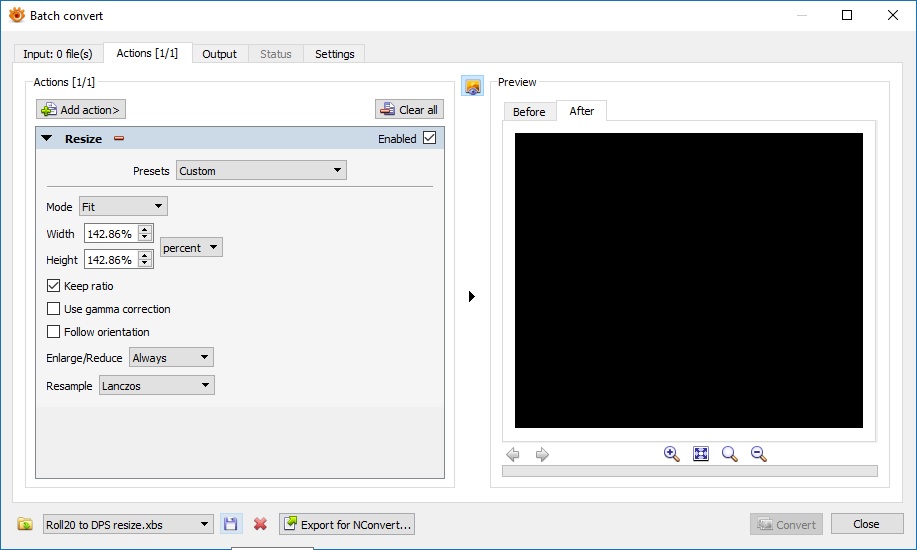
You can use pretty much any resolution for Fantasy Grounds, but if you're using the classic edition you're going to want to stay at 100 px or less for a 20x20 square map, and not get much bigger than that.

When you resize assets, you need to make sure you're sizing them to 200 px/square resolution as I described. That way everything will have the same level of detail and be scaled correctly inside DPS. If you're still getting blurry maps, the assets you're using might not be scaled right.
Декапитошка Sep 4, 2020 @ 12:10pm 
Great guide, but i am still upset, cos DPS blurring the original image, so im getting a lower quality of dungeon map, that it is in a image browser. Can some1 help me to find how to make proper quality in DPS? All those things what TS said, i did correctly.